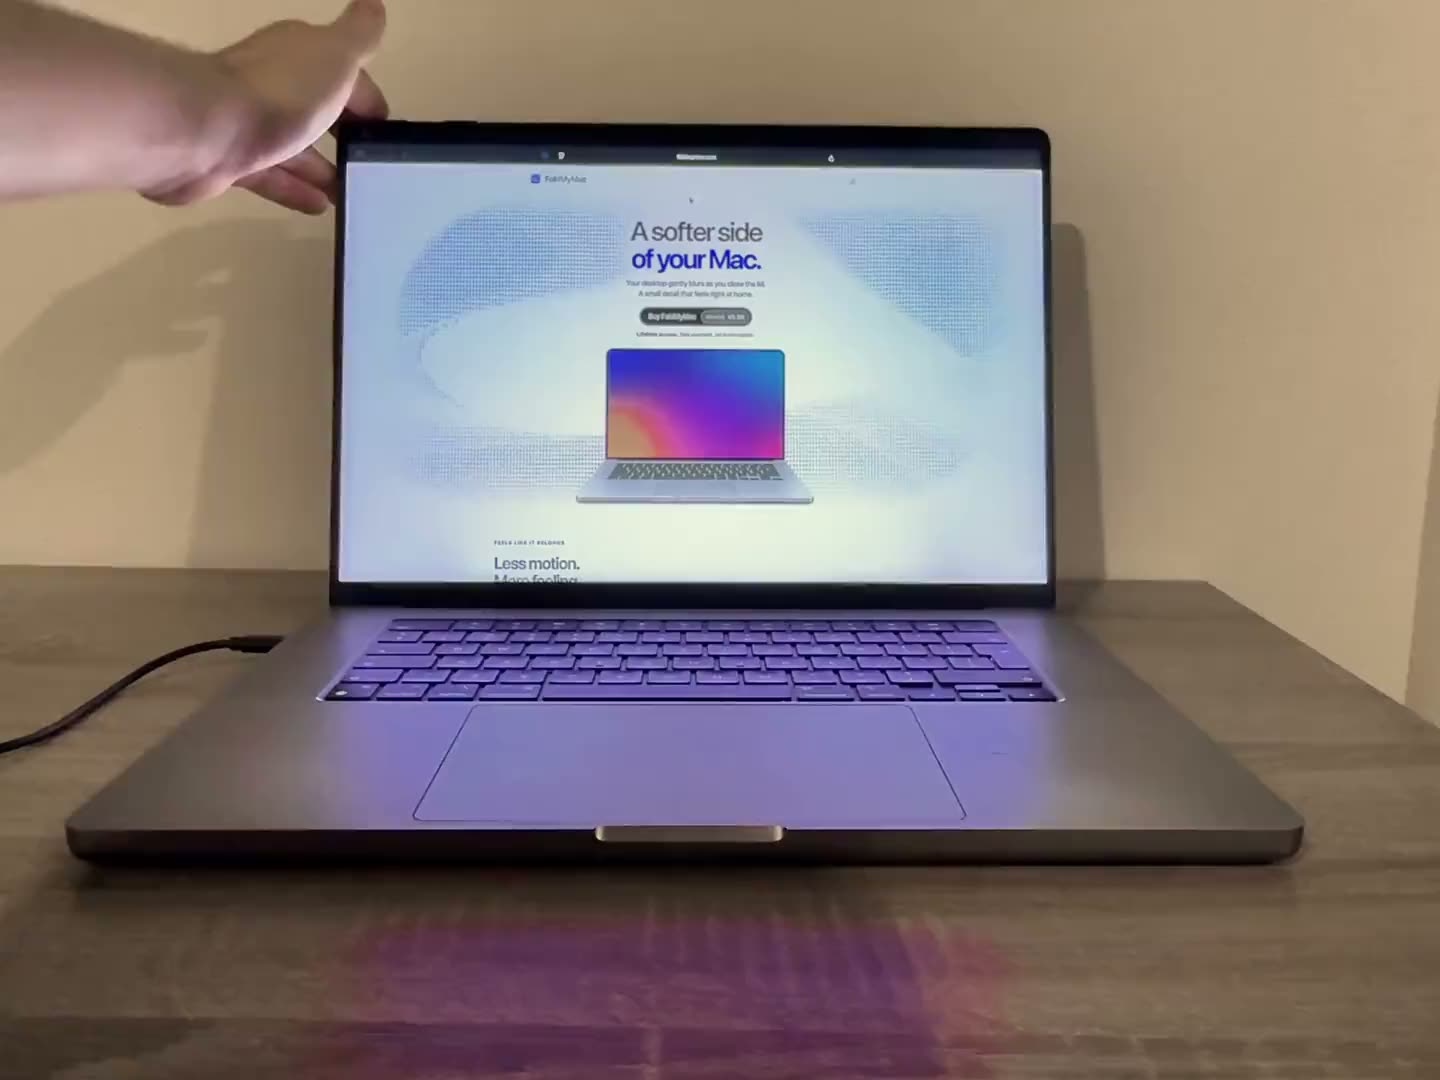
To record a MacBook screen aesthetic enough for Reels or TikTok, prepare the desktop first (clear icons, silence notifications, pick a clean wallpaper), then decide whether you need a screen recording or a phone filming the Mac itself. Use the built-in recorder (Shift-Command-5) for what is on the display, and a phone for anything that involves the lid, the keyboard or the room around the laptop. Light and angle usually matter more than any software.
Record a MacBook screen aesthetic: clean the desktop first
Viewers read the screen before they read anything you say. A desktop covered in files, half-finished screenshots and a crowded menu bar looks messy on a phone-sized video, where everything is small. Spend five minutes here before you press record.
Tidy what is visible
- Move files off the desktop. Drop them into one folder, or into a temporary folder you can put back later. A bare desktop also protects you from showing client names or personal documents by accident.
- Choose one wallpaper with a calm centre. A busy photo competes with windows and cursor movement. Soft gradients and dark, low-contrast images tend to read well on camera.
- Trim the menu bar. Quit menu-bar apps you do not need for the shot, so only a few icons remain.
- Close extra windows. Keep the one or two you actually want in frame.
Silence notifications
Turn on a Focus before filming. According to Apple, you can open Control Center, click Focus and pick one, and you can choose how long it stays on. Notifications are silenced while it is active, so a message banner will not land in the middle of your best take. Turn it off again from the same place afterwards.
Filming the Mac itself
If your video shows the laptop as an object (the lid, the hinge, the screen in a room), you need a camera rather than a screen recording. The side-view clip on our homepage was filmed with a phone.
Angle
A side view shows the hinge and the lid moving, which is the part a screen recording cannot capture. A slightly raised, three-quarter angle shows the keyboard and the display together. Keep the phone still: a small tripod, a stack of books or a shelf works. Handheld footage of a screen tends to wobble, and the display's own motion makes that worse.
Light and reflections
- Watch the glare. A glossy display reflects windows, lamps and you. Move the laptop or the light until the reflections fall off the screen, and check the preview on your phone before the real take.
- Light the surroundings, not the screen. A softly lit desk or wall behind the laptop makes the screen look brighter by contrast.
- Raise the screen brightness. A dim display looks washed out on camera, especially in a bright room.
Frame for vertical
Reels and TikTok are watched on a vertical screen, so film vertically too, or leave enough space around the laptop to crop later. The side-view clip on the FoldMyMac homepage is vertical, 720 by 1280 pixels. Leave some room at the top and bottom where apps place captions and buttons.
Showing motion with the lid
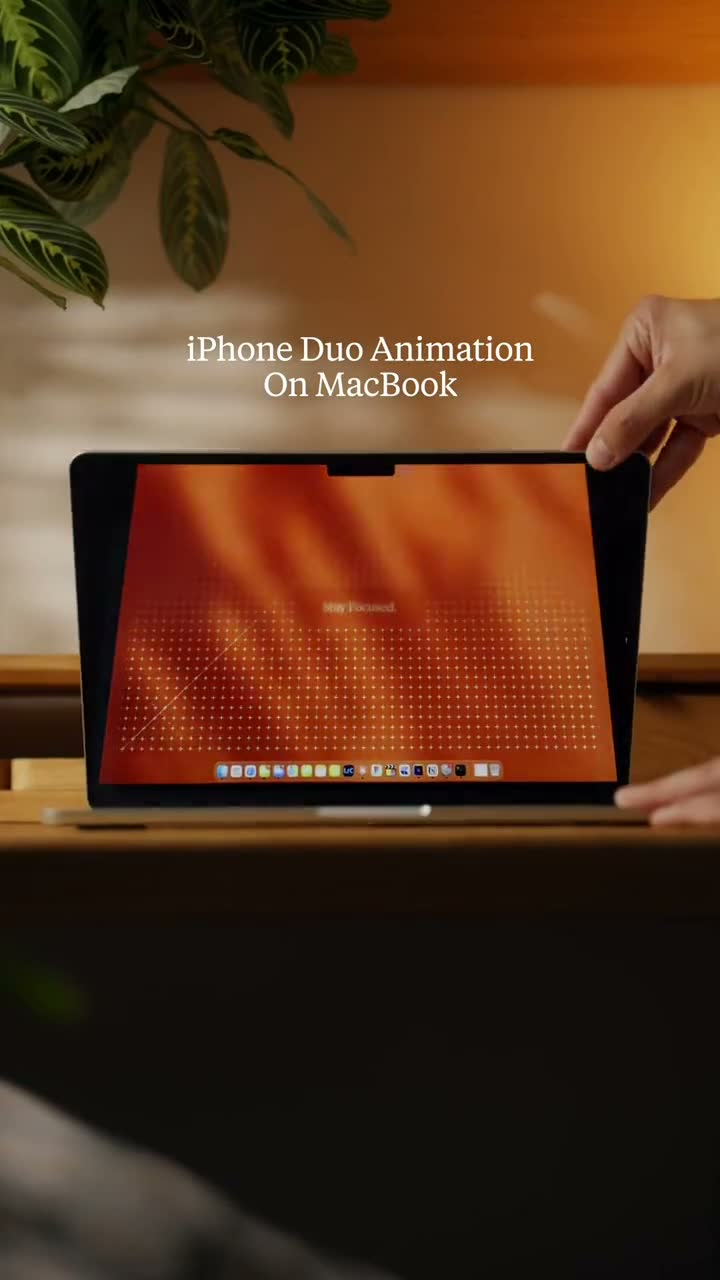
A static desktop is fine for a tour, but a moving one holds attention. The lid is a natural thing to animate: opening and closing it is something everyone understands in half a second.
FoldMyMac is one example. It is a macOS menu-bar app that bends and blurs the desktop as you close the MacBook lid, driven by the built-in lid-angle sensor (see how it works for the details). Because the effect follows the real hinge, the shot has a clear beginning and end: lid open, desktop clear; lid closing, desktop folds; lid opens, it springs back.
Film it with a phone, not a screen recording
The effect depends on your physical lid, and a screen recording cannot show your lid moving. Film the Mac with a phone instead. That also shows the hinge and the display together, which makes it obvious that the desktop is reacting to the real lid. Also keep in mind that protected video cannot be included in the fold, so do not rely on a streaming service playing in the background of the shot. Press Escape to pause the effect when you need to.
Practical tips for a clean take
- Do a few slow test closes first and look at the footage, not the live screen.
- Use the in-app preview to pick the style and strength before you film. FoldMyMac has three looks (Silk, Shade and Frost) and sliders for perspective, blur and shadow.
- If the effect starts at a lid angle you do not like, set where it clears with Use current angle in the app.
- Only the MacBook's built-in display is affected, so keep the shot on the laptop screen rather than an external monitor.
- Not every MacBook exposes a readable lid-angle sensor. Check the compatibility page before planning a shoot around it.

Screen recording options on macOS
When the display is the whole story (an app walkthrough, a workflow, a settings tour), a screen recording gives you a sharper result than filming the screen. macOS has a recorder built in.
- Press Shift-Command-5 to open the screenshot toolbar.
- Choose to record the entire screen or a selected portion.
- Open Options to pick a microphone, set a timer, show or hide the mouse pointer, and choose where the file is saved.
- Click Record, then stop with the stop button in the menu bar.
Apple says recordings are saved as .mov files with the date and time in the name, and by default they usually land on the desktop. Remember that when you tidy the desktop: new recordings land right on the clean surface you just made, so change the save location to a folder if you plan to film more than once.
Screen recording or phone?
| You want to show | Better choice |
|---|---|
| An app, a workflow, a settings tour | Screen recording |
| The laptop as an object, the hinge, the lid closing | Phone filming the Mac |
| A desk setup or mood shot | Phone filming the Mac |
| Text that must stay crisp and readable | Screen recording |
You can mix both: a phone shot for the opening, then a screen recording for the part that needs to be readable.
Export tips for vertical video
We will not quote platform specifications here, because they change and differ per app. Check the current upload guidance in the app you post to. These habits hold up either way.
- Crop to vertical on purpose. A 9:16 frame is the usual target for Reels and TikTok. Reframe each clip so the Mac sits in the middle of the frame, not in a corner.
- Keep important things away from the edges. Captions, usernames and buttons cover the top and bottom of the screen in most apps.
- Cut the dead time. Trim the seconds before the lid moves and after the desktop clears. Short clips loop better.
- Zoom in on text. If a screen recording has small text, crop in so it is readable on a phone.
- Watch it on a phone before posting. Reflections and tiny UI that looked fine on the laptop often fail on a small screen.
- Use only your own footage and audio. Do not borrow clips or music you do not have the rights to.
FAQ
How do I record my MacBook screen so it looks good?
Clean the desktop, silence notifications with a Focus, choose a calm wallpaper, then press Shift-Command-5 to record the whole screen or a portion of it. Check the saved .mov on a phone-sized screen before posting.
Can I record the MacBook lid closing with a screen recording?
No. A screen recording only captures what the display shows, not the lid itself. To show a lid closing, film the Mac with a phone, ideally from the side so the hinge is visible.
How do I stop notifications from appearing while I film?
Open Control Center, click Focus and choose a Focus such as Do Not Disturb. Notifications are silenced while it is active, and you can set how long it stays on.
Does FoldMyMac show up in a normal screen recording?
We have not published a recording-compatibility guide, so we do not make claims here. The effect follows the physical lid, so for the lid-closing shot we film the Mac with a phone. The FAQ covers permissions, privacy and compatibility.
For more, browse all articles on the blog.